Azure Virtual Desktop is a cloud-based service that allows access to a full desktop environment over the internet. This service is available to students for access in TILE Classrooms and for other University courses.
Note: Your first connection to Azure Virtual Desktop may take up to a minute. Future logins will be much quicker.
To connect to your devices and apps from Azure Virtual Desktop on a web browser, follow these steps:
- Open your web browser and go to https://windows.cloud.microsoft/.
- Sign in with your HawkID@uiowa.edu account.
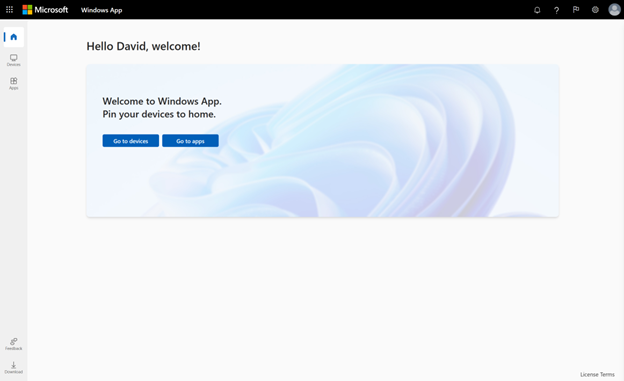
- If it's your first time using Windows App, navigate through the tour to learn more about Windows App, then select Done, or select Skip.
- From the Home tab, select Devices or Apps (depending on which you have access to).

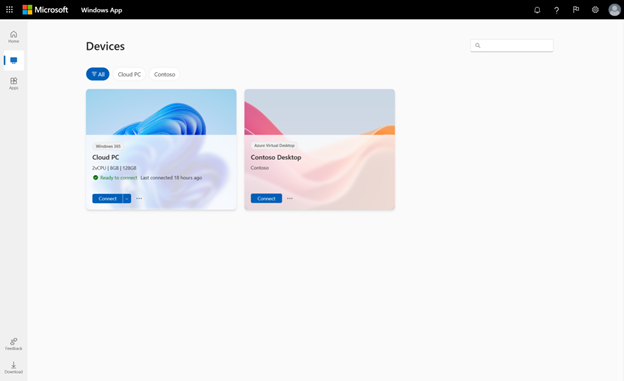
- You'll see your devices and apps from Azure Virtual Desktop, along with any other remote resources you have access to. If you don't see any devices or apps, contact the ITS Help Desk. Find the device or app you want to connect to. You can use the filters to help you find what you want to connect to.

- Select Connect. A new tab or browser window opens for that device or app.

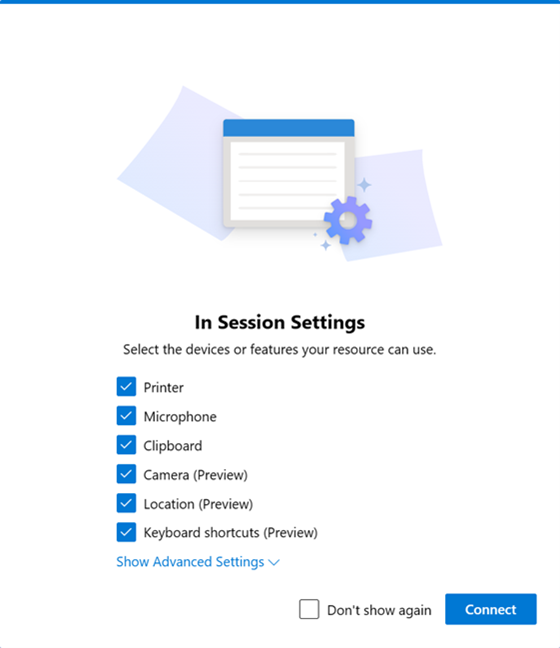
- A prompt for In Session Settings is displayed asking you confirm which local devices or features to use in the remote session. Make your selection, then select Connect. If you don't want to see this prompt each time you connect, check the box for Don't show again. You might be prompted to enter the password for your HawkID account again.
- Once the connection to your device or app is complete, you're ready to start using it.
Tip: You can pin your favorite devices and apps to the Home tab for quick access. To learn more, see Device and app actions in Windows App.
To connect to Azure Virtual Desktop on Windows please use the steps found on this Microsoft support page.
To connect to Azure Virtual Desktop on Windows please use the steps found on this Microsoft support page.
To connect to Azure Virtual Desktop on Windows please use the steps found on this Microsoft support page.
- Download and install the Remote Desktop client (RD Client) app from the Play Store
- Open the RD Client app
- Connection Center, tap +, then tap Add Workspace.
- In the Email or Workspace URL box enter https://rdweb.wvd.microsoft.com
- Tap Next
- When prompted, sign in using your HawkID and Password
- Your workspace will show any desktops you were assigned
Instructions on how to connect from your Android/Chrome OS device can be found in this Microsoft support article.