This support article pertains to the SiteNow v1 platform. Click here for SiteNow v2 documentation.
Creating content is the most important part of building a website. On SiteNow, creating and managing content is easy with the shortcut toolbar's 'Add content' and 'Find content' buttons.
Creating a Basic Page
- The first step in creating a node (article, event, basic page, etc.) is to click 'Add content' in the shortcut toolbar.
- You should see a screen like this, which lists the types of content you may create. Select 'Basic Page' to get started.
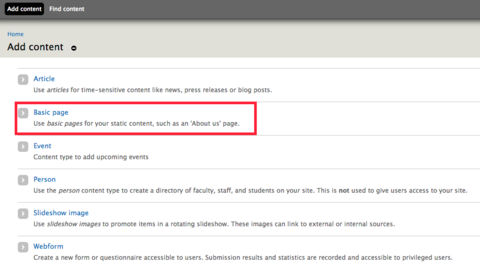
- You will be required to enter a title for your page. There will also be a box for a description (the body of your page).

- Once you're finished with these steps, you will be provided with additional editing options.
- Remember to click 'Save' at the bottom of the page when you are finished entering information.
Creating an Article
- Start by clicking 'Add content' in the shortcut toolbar.
- Select 'Article' at the top of the resulting screen.
- You will be required to enter a title for your article. Beneath this, you have options to add a featured image and the content of the article in the 'Body' section.
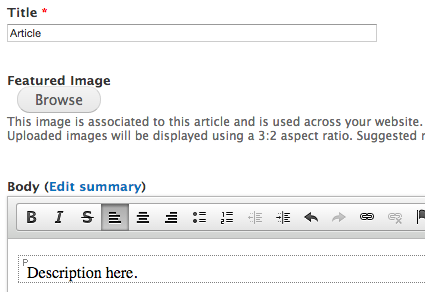
- To add a featured image, firstly click on the 'Browse' button.
- Note: featured images must be less than 4 MB and formatted as a png, gif, jpg, or jpeg.
- You have two options for selecting an image. Firstly, you can choose one from your computer by clicking 'Choose file.' Or, you can click the 'Library' tab in the upper right-hand corner and select an image that is already uploaded onto your site.

- Once you've selected an image, click 'Upload' and then you will be directed to another page, to enter a title for your image, as well as alternative and title text. Alternative text, as it says below the corresponding box, is used by screen readers, search engines, and when the image cannot be loaded. As accessibility is a priority for University of Iowa websites, it’s important to enter alternative text describing the picture you have included. Title text is shown when a user hovers their mouse over an image. Some webmasters see no difference between the title text and alternative text, and may even choose not to include title text. Others make their title text short and concise, functioning as an actual title. It depends on the preference of the website builder.
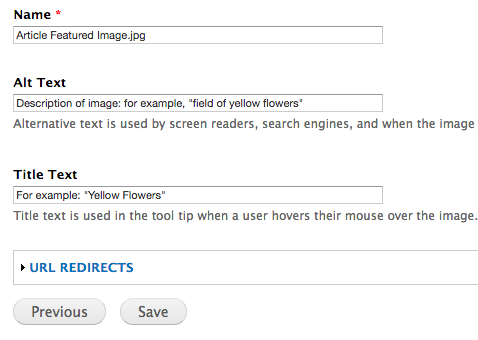
- Once you've finished with these items, click 'Save' and your image will be included.
- You may, however, be directed to crop the image. To do this, firstly press the 'Crop' button below the uploaded image.
- The quickest, easiest way to crop is to click 'Maximize Selection' in the bottom right hand corner of the resulting screen.
- After this, click 'Save,' and your image will be cropped and usable.
- To add a featured image, firstly click on the 'Browse' button.
- Once you're finished with these steps, a common option is to create a menu link for this page. See Creating a menu link to a page for more information.
- Remember to click 'Save' at the bottom of the page when you are finished entering information.
Creating an Event
1. Start by clicking 'Add content' in the shortcut toolbar.
2. Select 'Event' in the middle of the resulting list.
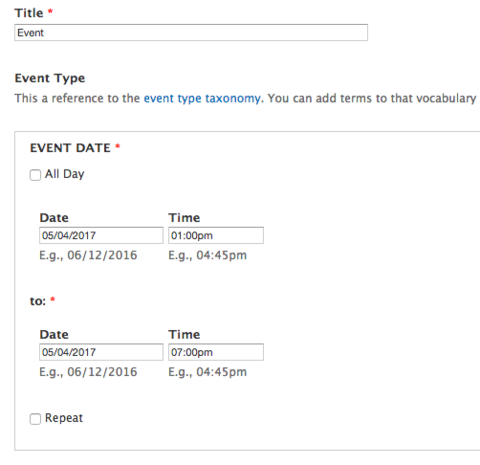
3. You will be required to enter a title for the event. You can also enter an Event Type (using previously created taxonomy terms), as well as date and time information (in the 'Event Date' section)
- To make the event last all day, you can select 'All Day' at the top of the 'Event Date' section
- You can make the event repeat annually (a holiday event, for example) by clicking 'Repeat' at the bottom
- If you want the event to be featured on the front page of your site (by clicking 'Promote to Front Page' in 'Publishing Options' at the bottom), you'll need to make sure it is set for a time in the future. SiteNow will not promote events that have already happened.
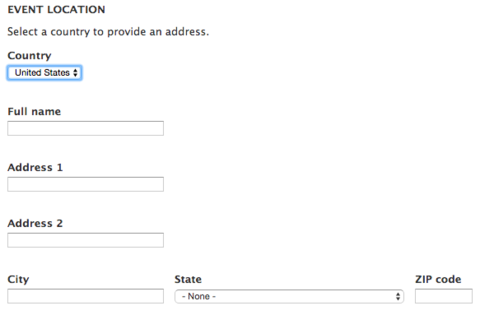
4. After you've entered the description for your event, you can provide an address (this is optional). Under the section marked 'Event Location,' click the 'Country' dropdown menu to select te United States. Doing this will pull up several text boxes where you can enter the event's address.
5. Remember to click 'Save' at the bottom of the page when you are finished entering information.
Creating a Person
1. Start by going to 'Add content' on the shortcut toolbar.
2. Near the bottom of the resulting list, click 'Person.'
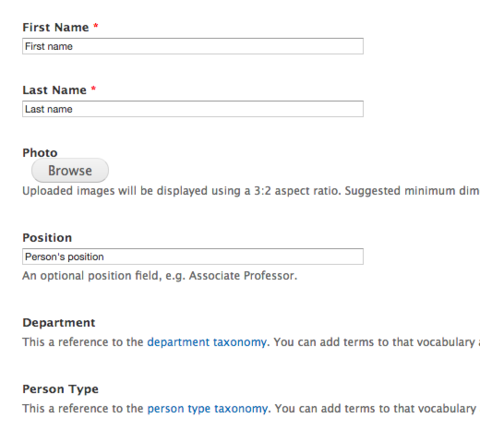
3. You should see a screen similar to the one shown in the picture below.
- There are firstly boxes to enter the person's first and last name.
- There is a place to add a photo of the person (remember to use alternative text).
- Below the photo section, you may enter the person's position.
- You may also select a 'Department' and a 'Person Type' for your person (this is optional). These are references to taxonomy.
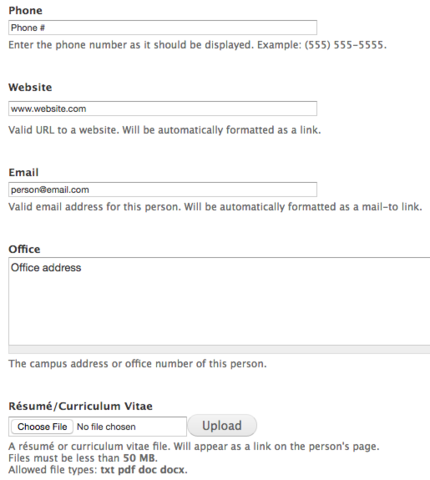
4. Once you've finished entering that information, you can also add their phone number, website, email address, and office address. In addition, you can choose a file to upload as a résumé. This will appear as a link on the person's page.
5. Remember to click 'Save' at the bottom of the page when you are finished entering information.
Creating a Slideshow Image
1. Start by clicking 'Add content' in the shortcut toolbar.
2. Near the bottom of the resulting list, select 'Slideshow Image.'
3. You should see a page with various options.
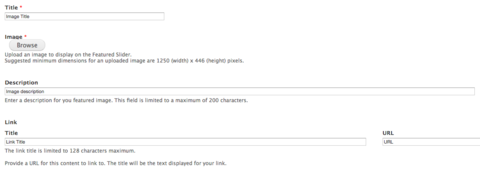
- Firstly, you are required to enter a title.
- Below this, click 'Browse' to access the image you want to use. Note: slideshow images must be less than 4 MB and formatted as a png, gif, jpg, or jpeg. The minimum size is 600x215 pixels, while the maximum size is 2000x2000 pixels.
- You have two options for selecting an image. Firstly, you can choose one from your computer by clicking 'Choose file.' Or, you can click the 'Library' tab in the upper right hand corner and select an image that is already uploaded onto your site.

- Once you've selected an image, click 'Upload' and you will be directed to another page. Here you can enter a title for your image, as well as alternative and title text. Alternative text, as it says below the corresponding box, is used by screen readers, search engines, and when the image cannot be loaded. As accessibility is a priority for University of Iowa websites, it’s important to enter alternative text describing the picture you have included. Title text is shown when a user hovers their mouse over an image. Some webmasters see no difference between the title text and alternative text, and may even choose not to include title text. Others make their title text short and concise, functioning as an actual title. It depends on the preference of the website builder.
- Once you've finished with these items, click 'Save' and your image will be included.
- You have two options for selecting an image. Firstly, you can choose one from your computer by clicking 'Choose file.' Or, you can click the 'Library' tab in the upper right hand corner and select an image that is already uploaded onto your site.
- You can also provide a URL for the picture to link to (embedding a URL redirect within the picture). To do this, add a title for the link (what will show up on the button users click on to access the link) and the specific URL you wish to redirect users to.
4. Below these options there is a dropdown menu for the Category of the image. This is referring to the Slideshow Image Category taxonomy. You can click the blue text below to create a new category term that will then appear in the dropdown menu.

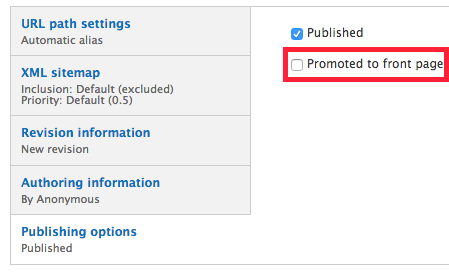
5. If you want the slideshow image to show up on the front page of your site, you'll need to scroll down to 'Publishing Options' near the bottom of the page and click the box to the right reading 'Promoted to Front Page.'
6. Remember to click 'Save' at the bottom of the page when you are finished entering information.
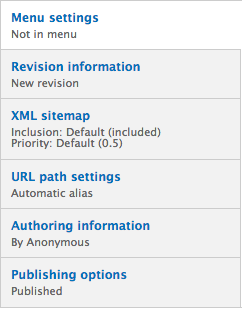
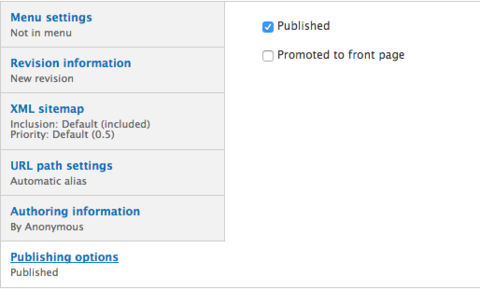
When creating a node (article, event, basic page, etc.) there are several options that appear at the bottom of the editing screen. These options are almost exactly the same for each item you create.
Menu Settings
The first option on the list is 'Menu Settings.' This is very important if you want your content item to have a menu link attached to it.
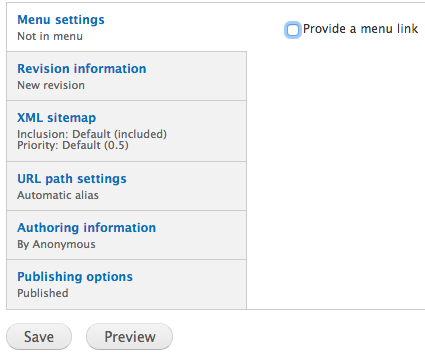
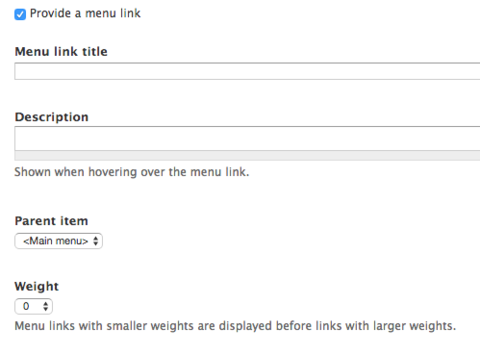
If you click the 'Provide a menu link' box, you will receive another list asking for the title, description, parent item, and weight of your menu link.
- The title will automatically be what you titled your node, but you can change this if you wish.
- The description is shown when a user hovers over the menu link, and is intended to describe the link's content.
- The 'parent item' tells you where your menu link can be found. It defaults to the main menu, but you can change this by selecting another location in the dropdown menu.
- The 'weight' of your item determines its position in the menu, or you can choose to rearrange menu links using the drag-and-drop method, which many users consider easier (see Changing the order of menu links)
Revision Information
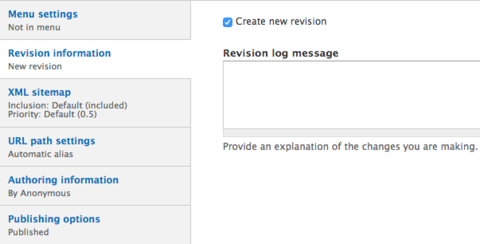
The 'Revision Information' section makes it easy to remember changes made to a node. The 'Create new revision' box is checked automatically. When you come back to edit a published node, you can leave a note in the 'Revision log message' box regarding what you changed or added. this will help other authors understand your motivations. Adding a revision log message is only relevant if there are others working on the site with you, or if you want to remind yourself why you made a change.
XML Sitemap
This section is a little more advanced, and many users choose not to change anything.
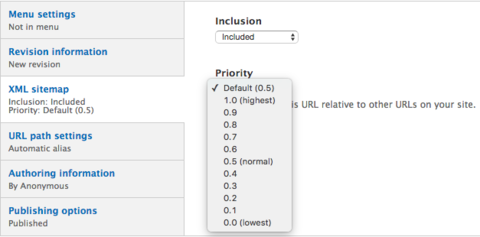
An XML sitemap provides information about your site to search engines, listing the URLs for your site by priority when search engines are combing through it.
SiteNow excludes the XML sitemap by default, but this can be changed. Under ‘Inclusion,’ switch from the ‘Default (excluded)’ to ‘Included.’ Once you’ve done that, another bar will pop up below asking for the priority of this specific URL as opposed to other URLS on your site. It will default at 0.5, where 1.0 is the highest and 0.0 is the lowest. You can adjust the priority as well. For example, if someone was using a search engine (like Google or Bing) to search for content related to your website, having a high priority (in the 0.7-1.0 range) would mean that this specific item would be listed near or at the top of the list, appearing before other items with lower priority on your site. This can be useful if you want to draw user attention to a specific item – all you need to do is set it at a higher priority level. However, many webmasters have no preference for the order in which various aspects of their site are listed, so they prefer to leave the XML sitemap excluded. When in doubt, it's a good idea to trust the default.
URL Path Settings
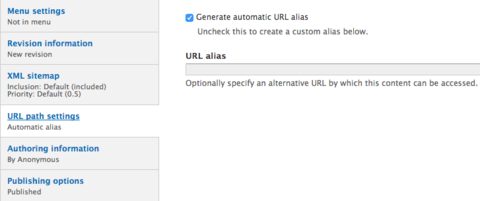
The 'URL path settings' section is helpful for editing the URL of your page. The button to 'Generate automatic URL alias' will already be checked. This means that the site will provide a specific URL for your item by itself. If you don't like this, you can always change the name of the URL by unchecking the 'Generate automatic URL alias' box and typing in your preferred URL alias in the textbox below.
Authoring Information
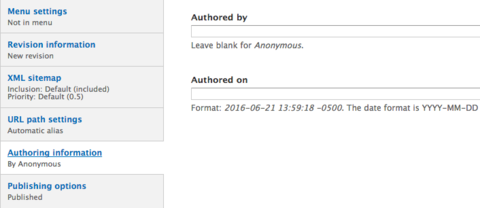
The 'Authoring Information' section provides extra details about the author of a specific page and the time they created or edited the page.
The first box in this section is the 'Authored by' box. Your HawkID should automatically be shown here. You can, however, delete your HawkID and leave the box blank if you don't want your name listed. This will identify you simply as 'Anonymous.'
In the second box, you can enter the date and time that the page was created. Formatting instructions for this are found right beneath the box.
Publishing Options
The 'Publishing options' section is important for determining whether or not your page is published, and where your page shows up on your site.
By default, the 'Published' box will be checked. This means that as soon as you click 'Save' at the bottom, your page will be live on your site. By unchecking the box, the page will not be published, but it may still be found in 'Find content.'
The 'Promoted to Front Page' box will be unchecked by default. Checking this box ensures that your page will be shown on the front page of your site.
See the Glossary of Terms for SiteNow (Drupal) for definitions of specific terms.
